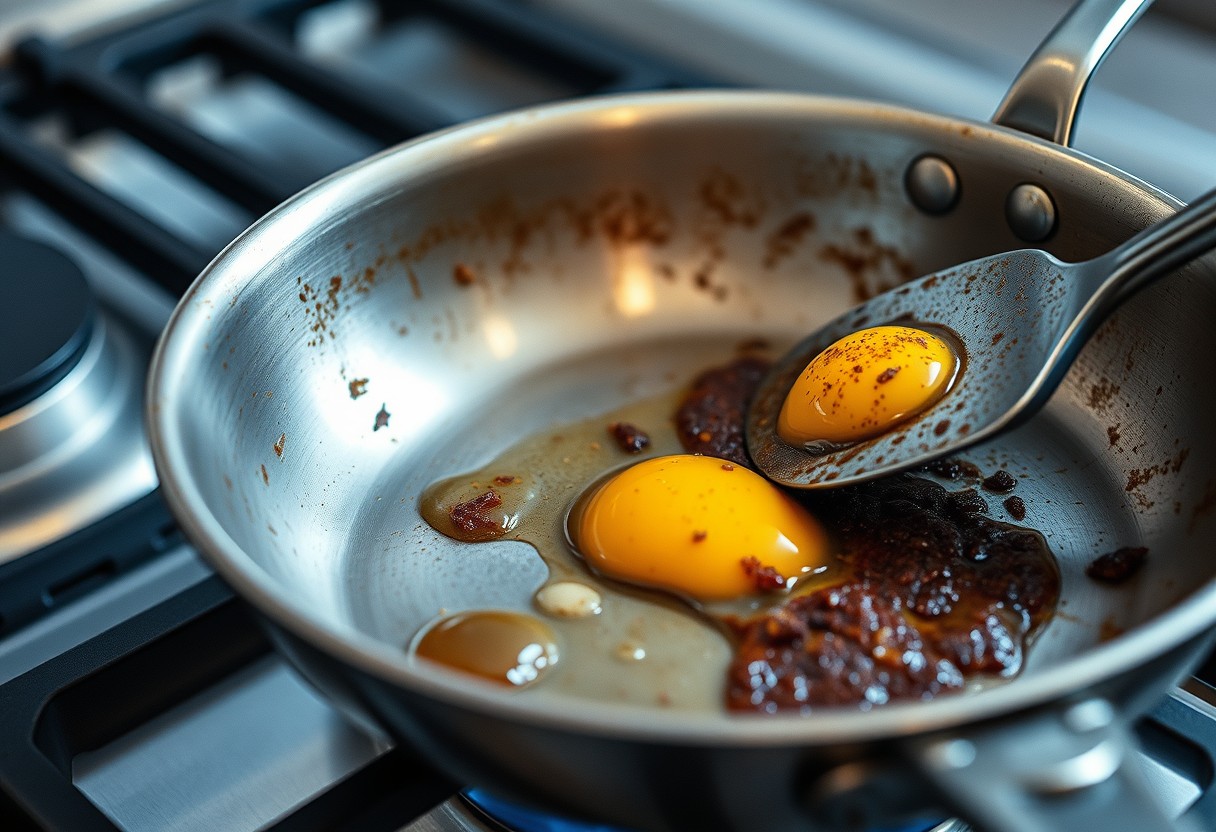
You’ve seen it happen: proteins weld themselves to the surface, eggs cling stubbornly, and even vegetables resist release. The culprit isn’t just a cheap pan-it’s how you’re using heat, oil, and timing. Understanding the science behind sticking helps you avoid frustrating failures and potential health risks from scorched food. You can fix this with simple, proven adjustments.
Key Takeaways:
- Protein-rich foods like eggs and meat bond easily with stainless steel because their proteins can chemically attach to metal surfaces when the pan isn’t hot enough or isn’t properly preheated.
- Water on food or in the pan creates steam that prevents proper browning and promotes sticking, so drying ingredients thoroughly before cooking makes a visible difference.
- Using the right amount of fat at the right time-and letting food sear undisturbed-creates a barrier and allows natural release, which many mistake as a nonstick feature but is actually controlled chemistry.
The Microscopic Crime Scene
When you drop chicken into a hot pan and it instantly grips the surface, you’re witnessing a silent chemical exchange at the atomic level. Proteins in the food, especially in meat and eggs, carry reactive amino acids that form strong bonds with iron and other metals in your cookware. This reaction happens fast-within seconds-when bare protein meets bare metal. Without a barrier like oil or a proper seasoning layer, your food becomes chemically glued to the pan, tearing apart as you try to flip it. What looks like a simple cooking mishap is actually a precise molecular crime.
Protein Adhesion
Proteins begin to denature the moment they touch heat, unraveling and exposing sticky amino acid chains that aggressively latch onto metal surfaces. These exposed strands create direct chemical bonds with the iron atoms in your pan, forming a stubborn link that resists movement. This is especially common with high-protein foods like eggs, fish, and poultry, which have abundant reactive sites. Even a few seconds of contact without protection can seal the bond. Once this connection forms, no amount of shaking will free your food without damage.
Metal Pores
Your pan’s surface isn’t as smooth as it looks-under magnification, cast iron and stainless steel reveal a network of microscopic pits and ridges. These tiny crevices trap air, moisture, and food particles, creating perfect anchor points for proteins to seize and hold on. When heated, the metal expands slightly, tightening its grip on food remnants caught in these pores. Cooking without a proper oil layer leaves these openings exposed and active, turning your pan into a griddle-sized Velcro strip. Seasoning or fat fills these gaps, blocking direct contact and preventing adhesion at the source.
The Heat is the Law
Temperature controls how your food interacts with the pan at a molecular level. When you apply consistent heat, the metal expands slightly and forms a more uniform surface that resists bonding. If you start cooking too soon, proteins and sugars in food latch onto microscopic imperfections, creating a stubborn grip. Waiting for the right thermal threshold ensures the first contact is brief and non-stick. This moment of readiness isn’t guesswork-it’s physics working in your favor.
Cold Pan Mistakes
You often rush to add food the moment the pan touches the stove, but that cold start sabotages everything. A cool surface allows fats to pool unevenly and proteins to seep into tiny grooves in the metal. As the pan slowly heats, those proteins solidify and weld themselves in place. Starting with a cold pan dramatically increases the odds of tearing delicate items like fish or eggs when you try to flip them. Patience here isn’t passive-it’s active control.
The Leidenfrost Barrier
When your pan reaches a high enough temperature, a thin layer of vapor forms beneath each droplet of moisture, making it skitter across the surface like a hovercraft. This phenomenon, known as the Leidenfrost effect, signals that the pan is hot enough to repel water-and prevent food from sticking. That dancing water isn’t just a show; it means the surface is primed to create instant resistance against adhesion. Recognizing this moment gives you a clear, scientific signal: now is the time to add food.
Lubrication or Death
Without a proper layer of fat between food and metal, your pan becomes a trap. Oil fills microscopic peaks and valleys in the cooking surface, creating a buffer that prevents proteins from welding themselves to bare spots. When you skip this step, even briefly, the risk of stubborn sticking skyrockets-especially with delicate items like fish or eggs. You’re not just adding flavor; you’re building a functional defense. Skipping fat isn’t thrift-it’s surrender to scorch and scrapes.
Oil Viscosity
Thinner oils spread faster and seep deeper into tiny crevices, giving you immediate coverage when the pan hits heat. Canola and grapeseed glide easily, forming an instant shield, while heavier oils like unrefined coconut may leave patches exposed during critical first seconds. Your oil must move quickly before proteins react, so choose one that flows under pressure and temperature. A sluggish pour means gaps-and gaps mean stuck food.
Polymerized Layers
A well-seasoned pan already has a built-in barrier: a smooth, carbonized film formed through repeated heating and oiling. This polymerized layer reduces the need for excess fat by naturally repelling reactive foods. When maintained, it acts like nonstick armor beneath every cook. But if scratched or burned off, you lose that protection and return to square one-bare metal meeting raw protein. Keep this coating intact, and your lubrication works smarter, not harder.
The Curse of the Damp Cut
Moisture is the ultimate enemy when you’re chasing a perfect sear, and it’s likely sabotaging your results without you realizing it. Even a seemingly dry piece of meat can release enough internal water to create steam under pressure, instantly lowering the pan’s surface temperature. That burst of steam forces food to boil in its own juices instead of browning, creating weak spots where proteins bond directly to the metal. You might think you’re searing, but you’re actually simmering, and that’s why your crust fails. For more on common missteps, see this discussion: What am I doing wrong when re-seasoning a pan with …
Surface Steam
Steam erupts the moment wet food hits blazing metal, and that violent reaction works against you. The vapor doesn’t just float away-it gets trapped between the protein and the pan, forming a barrier that prevents direct contact. Without consistent metal-to-food contact, Maillard reactions can’t occur evenly, leaving patches of gray, sticky residue. This is especially dangerous with chilled or recently rinsed ingredients, as their surface moisture multiplies the effect. You lose control of browning the second steam wins, turning what should be crisp into a gluey mess.
Paper Towel Necessity
Drying your ingredients thoroughly isn’t optional-it’s non-negotiable for a clean sear. A single damp surface invites disaster, no matter how hot your pan or seasoned your skillet. Press each piece firmly with paper towels, replacing them until no moisture transfers. Skipping this step means carrying water straight into the heat, guaranteeing steam buildup and sticking. Clean, dry contact is the only path to separation and color. Treat every ingredient like it must earn its place in the pan, starting with being completely dry.

The Virtue of Patience
Letting your food sit undisturbed is the single most effective way to prevent sticking. When you constantly prod or flip, you interrupt the process that allows proteins and sugars to detach naturally from the pan’s surface. Resisting the urge to touch gives the Maillard reaction time to complete, forming a stable crust that releases cleanly. Even if it seems stuck at first, waiting just 30 seconds longer can make all the difference. Trust the heat-your patience creates the separation you’re looking for.
Natural Release
Food sticks initially because proteins bond with metal before fully cooking. Over time, these bonds break as the proteins denature and firm up. If you wait, the piece will eventually pull away with little resistance, leaving behind only fond, not fragments. For meats and tofu alike, this moment of release happens predictably when heat has penetrated evenly. Forcing it too soon tears the surface, leaving behind a ragged layer that compromises both texture and presentation.
Crust Formation
A well-developed crust acts as a natural barrier between your food and the pan. This layer forms when moisture evaporates and amino acids react under sustained heat. Once established, it prevents further adhesion and enables effortless flipping. You’ll notice the edges crisp and brown, and the center begins to lift slightly from the surface. That visual cue means the foundation of flavor and function is ready-disturbing it now risks undoing all the work heat has done.
Respect the Tools
Your pan remembers every mistake you’ve made. Each time you shock it with cold water while still hot, or scrape it with a metal utensil after heating, you compromise its surface integrity. A well-treated pan develops a natural resistance to sticking through consistent use and proper care-this isn’t magic, it’s metallurgy. Damaging the surface means inviting food to bond where it shouldn’t, undermining all your technique. How you clean, store, and handle your cookware directly affects its performance next time. Treat it like a partner, not a disposable tool.
Deglazing Basics
After cooking, use residual heat to loosen stuck bits by adding a splash of liquid while the pan is still warm. Wine, broth, or even water works-just ensure the pan isn’t scorching hot when you add it to avoid cracking or warping. The sizzle is your signal that deglazing is working, lifting flavorful fond without damaging the surface. Use a wooden or silicone spatula to gently nudge particles loose. This method cleans effectively while preserving the pan’s seasoned layer, especially on cast iron or carbon steel. Done right, it maintains performance for years.
Abrasive Warnings
Steel wool and harsh scrubbers might remove stuck food fast, but they strip away seasoning and scratch protective layers. Every aggressive scrape opens microscopic pathways for food to grip during the next cook. Nonstick coatings can flake off entirely under pressure, rendering the surface useless-and potentially unsafe. Even stainless steel suffers from repeated abrasion over time. Stick to soft sponges or nylon brushes for daily cleaning. Your pan will respond better to heat and release food more easily when its surface remains intact and smooth.
To wrap up
You now know that food sticks because of chemical bonds forming between proteins and metal, especially when heat, moisture, or timing are off. Your pan’s surface isn’t the enemy-your approach is the variable. Adjusting heat before adding oil, letting food sear undisturbed, and ensuring ingredients are dry all shift the outcome dramatically. Nonstick pans still demand care, while stainless steel rewards precision. The next time eggs weld themselves to the surface, you’ll recognize the misstep not as bad luck but as feedback. Mastery comes from paying attention to these small, repeatable details every time you cook.
FAQ
Q: Why does food stick to my pan even when I use oil?
A: Food sticks because proteins in ingredients like meat, eggs, or fish bond with metal surfaces before the oil has time to create a proper barrier. This happens most often when the pan isn’t hot enough before adding food or when oil is added too late. A cold pan allows proteins to latch onto microscopic peaks and valleys in the metal. Even with oil present, if it hasn’t had time to heat and spread into a protective layer, sticking occurs. Preheating the pan and letting the oil get shimmering before adding food prevents this bonding.
Q: Does the type of pan really affect how much food sticks?
A: Yes. Nonstick pans are coated to prevent adhesion, but they degrade over time with high heat or abrasive tools. Stainless steel and cast iron rely on proper technique-especially temperature control and seasoning-to avoid sticking. Cast iron develops a natural nonstick surface when well-seasoned, while stainless steel demands precise heat and timing. Thin pans with uneven bases create hot spots, increasing the chance of food catching. A heavy, well-constructed pan distributes heat more evenly and reduces sticking significantly.
Q: Should I always wait for the pan to preheat before adding oil?
A: It depends on the oil and cooking method. For searing meats or stir-frying, heating the pan first ensures the oil spreads quickly and forms an instant barrier. However, some oils like extra virgin olive oil can smoke or break down at high heat, so adding them just before food goes in works better. For delicate items like eggs, heating oil gradually with the pan helps build a stable nonstick layer. The key is matching your oil’s smoke point and the food’s needs to your pan’s behavior.
Q: Can moisture in food cause it to stick?
A: Absolutely. Water on the surface of meat, vegetables, or tofu instantly cools the pan when it makes contact, preventing the Maillard reaction and creating steam that traps food against the metal. This steam softens proteins and increases adhesion. Patting ingredients dry with a paper towel before cooking removes excess moisture and dramatically improves browning while reducing sticking. A steak straight from the fridge with condensation will cling far more than one dried and brought close to room temperature.
Q: Is there a way to fix a stuck-on meal while it’s still cooking?
A: If food resists movement in the pan during the first minute or two, it’s best to leave it alone. Premature scraping tears proteins apart, worsening the stick. Wait until edges begin to brown and pull away naturally-this signals the bond has broken. Adding a splash of liquid like broth, wine, or water can help loosen residues and create steam to lift stuck bits. In many cases, what appears stuck recovers once sufficient heat and time allow the surface to release on its own.