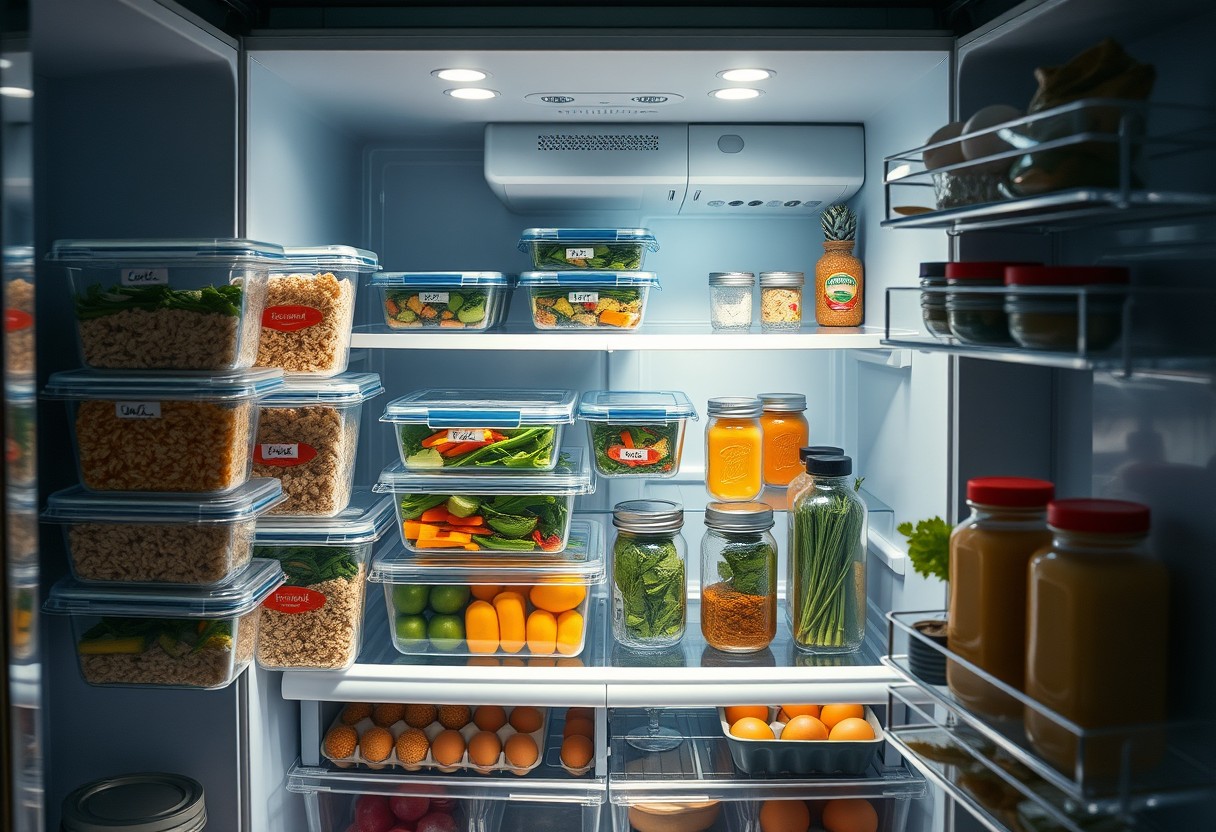
You just spent hours prepping meals, and now it’s time to store them safely. Improper storage can lead to spoilage or cross-contamination, putting your health at risk. Placing cooked dishes on the right shelf matters more than you think. Learn how to organize a fridge for better food management? and turn your effort into lasting results. Smart organization extends freshness and prevents waste.
Key Takeaways:
- Store cooked meals at eye level in clear, labeled containers to maximize visibility and access while minimizing forgotten leftovers.
- Keep raw proteins on the bottom shelf to prevent cross-contamination, using sealed containers or trays to contain leaks and maintain cleanliness.
- Group like items together-such as condiments, dairy, or produce-and assign each category a consistent home to make restocking and retrieval intuitive.
The Cold Chain Command
Temperature stability determines whether your meal prep stays safe or becomes a hazard. Refrigerator shelves maintain different thermal zones, and positioning food correctly prevents bacterial growth. The upper shelves hold the most consistent cold temperatures, making them ideal for items you won’t cook again before eating. Avoid placing perishable prepped meals on the door or near the fan, where temperature fluctuations are highest. Keep your fridge at or below 40°F (4°C) to ensure the cold chain remains unbroken from prep to consumption.
Utilize the upper shelf sanctuary for ready-to-eat preps and thermal consistency
You rely on these meals to be safe the moment you pull them out, so placement matters. The upper shelf offers the most stable and evenly cooled environment, perfect for salads, cooked grains, or portioned leftovers you’ll eat cold. Since this zone avoids frequent temperature spikes, it protects food integrity better than lower areas or the door. Store only ready-to-consume items here to eliminate the risk of accidental cross-contact with raw ingredients.
Enforce a bottom-shelf lockdown for raw proteins to prevent cross-contamination
Raw meat, poultry, and seafood carry pathogens that can spread if not contained. The bottom shelf is the coldest zone with the least airflow exposure, making it the safest spot for these high-risk items. Always place raw proteins in sealed, leak-proof containers or sealed bags and position them at the very back. This minimizes the chance of juices dripping onto other foods, which is one of the most dangerous sources of foodborne illness in home kitchens.
The Geometry of Glass
Square glass containers align edge to edge, eliminating the dead space that round plastic tubs leave behind. You gain up to 30% more usable shelf area by switching from circular designs, which forces air gaps on all sides. The rigid corners of square vessels interlock visually and physically, creating a stable grid that resists shifting. This efficient footprint means you can store more prepared meals in the same refrigerator zone, without overcrowding or stacking risks. Round shapes may seem convenient, but they’re inherently wasteful in a rectangular environment.
Eradicate inefficient round plastic clutter to maximize every square inch
Circular plastic containers create unavoidable voids between them, turning your fridge into a puzzle of wasted pockets. Each gap might seem small, but collectively they erase valuable storage capacity-space you could use for additional meal components. These rounded tubs rarely stack securely, increasing the risk of spills and obscured visibility. By replacing them with square or rectangular glass alternatives, you reclaim those lost corners and edges. You’ll notice immediate gains in organization and density, especially on narrow shelves where every centimeter counts.
Maintain vertical stack integrity for immediate visibility of your prep inventory
Stacking square glass containers vertically creates clean columns that let you see each layer at a glance. When rows stand straight and aligned, you can identify contents without moving multiple boxes. Any tilt or overhang breaks this system, hiding meals beneath and inviting disarray. Use containers of matching heights when possible to prevent structural instability and accidental toppling. A disciplined stack isn’t just neat-it turns your fridge into a transparent inventory system where nothing gets forgotten behind another dish.
The Labeling Manifesto
Labeling isn’t optional-it’s the only defense between your meal prep triumph and a fridge full of mysteries. Without clear identification, even your most meticulous containers devolve into culinary amnesia, where guessing replaces knowing. You’ve invested time, ingredients, and intention; protect that effort with visible, unambiguous labels. The moment you skip this step, you invite confusion, waste, and foodborne risk. Clarity today prevents regret tomorrow-your future self will open the fridge and know exactly what to eat, not wonder what’s lurking under a foggy lid.
Deploy blue masking tape and Sharpies as your primary organizational weapons
You’ll find nothing more reliable than blue masking tape and a bold black Sharpie for fridge labeling. This combo sticks securely through cold and condensation, resists peeling, and provides a clean, readable surface every time. Write the dish name clearly-“Chicken Curry” or “Lentil Soup”-so anyone (including your sleep-deprived self) can identify contents at a glance. Avoid sticky notes or flimsy labels; they dissolve or fall off, leaving containers anonymous. These simple tools create order from chaos and ensure your hard work stays recognizable, not reduced to a guessing game.
Apply a date-of-death mark to every lid to eliminate culinary guesswork
Your leftovers have a lifespan, and you need to know when it ends. Mark every container with the exact date it must be eaten by-not when it was made, but when it expires. This “date-of-death” stops hesitation and prevents illness. Whether it’s three days or five, that number on the lid removes doubt and enforces accountability. No more sniff tests or nervous bites-just a quick check and a decision. This small act is your strongest shield against food waste and stomach distress, turning uncertainty into confidence with every meal.
The FIFO Law
Rotation isn’t just a kitchen habit-it’s the frontline defense against spoilage. You follow FIFO not because it sounds efficient, but because letting older food linger in the back means inviting waste and potential contamination. Every item you prepped earlier has a shrinking window for safe consumption. Placing those containers at eye level or front shelf positions makes them impossible to ignore, turning visibility into accountability. When last week’s chili stares you down before dinner, you’re far more likely to eat it than let it become science experiment.
Rotate the old guard to the front lines to ensure immediate consumption
Older meals need prime real estate. Move any previously prepared dishes to the front of each shelf so they’re the first you see when opening the fridge. This simple shift forces attention where it’s needed most-on what must be eaten now. Failing to rotate means forgotten containers, and forgotten containers mean mold, odor, and wasted effort. Treat your fridge like a tactical operation: the oldest items lead, and everyone else follows.
Consign the new prep to the rear-guard until the veterans are cleared
Newly prepped containers belong behind existing ones, not in front. Slide fresh meals to the back, tucking them behind older counterparts so they don’t get prematurely chosen. This ensures that every new batch waits its turn, preventing accidental bypass of perishables nearing their limit. You aren’t hiding the new-you’re honoring the queue. Letting yesterday’s stew clear the field before today’s soup takes stage keeps waste low and discipline high.

The Crisper Purgatory
Your crisper drawer isn’t just a storage bin-it’s a climate-controlled environment designed to extend the life of your produce. Humidity control is your most powerful tool in delaying spoilage, especially for leafy greens that wilt within days without proper moisture balance. Too little humidity and your spinach turns brittle; too much without airflow and you invite mold. Adjust the slider settings according to your contents: high humidity for water-rich vegetables like kale or cucumbers, low for fruits that emit ethylene or are prone to rot.
Segregate high-moisture vegetation to prevent the rapid onset of rot
Leafy greens like arugula, butter lettuce, and fresh herbs hold significant moisture, making them prone to microbial growth when stored improperly. Keeping them separated from denser or ethylene-producing items reduces cross-contamination and moisture transfer. Use breathable produce bags or line containers with paper towels to absorb excess dampness. This simple act can extend the freshness of your greens by several days, preserving both texture and nutritional value far beyond typical fridge life.
Isolate ethylene gas producers to keep your greens from premature death
Apples, avocados, and ripe bananas release ethylene gas, a natural compound that accelerates ripening-and decay-in nearby produce. Exposure to even small amounts can cause lettuce to brown and herbs to yellow within 24 hours. Store these gas-emitting items in a separate crisper drawer or in a sealed container away from sensitive vegetation. By creating a physical barrier, you dramatically slow deterioration, ensuring your meal-prepped salads remain crisp and vibrant through the week.

The Door of Misfit Condiments
Temperature fluctuations are most extreme on the refrigerator door, making it the least stable zone for perishable items. You’re better off treating this space like a pantry extension rather than true refrigerated territory. Condiments with high acidity or salt content can withstand these swings without spoiling, but anything delicate will pay the price in texture and safety. Reserve this spot wisely-its convenience shouldn’t override preservation needs.
Reserve the door for items with high salt and acid survivability
Soy sauce, pickles, and hot sauce thrive in the door because their high salt or acid levels naturally inhibit bacterial growth, even when temperatures rise slightly during frequent openings. You’ll find ketchup and mustard also belong here, as commercial versions are formulated to last. Homemade or low-sodium versions, however, lack these preservatives and should be stored on interior shelves. Treat the door as a survival zone for shelf-stable favorites, not a catch-all for every bottle.
Avoid the dairy trap by keeping milk away from the door’s heat swings
Milk deteriorates faster when exposed to repeated warming and cooling, which happens every time you swing the door open. Storing it on the door can shorten its freshness by days, increasing the risk of spoilage and waste. You’ll preserve its quality longer by placing it on a middle or lower shelf, where temperatures remain steady. The door’s convenience isn’t worth the cost of souring your supply prematurely.
To wrap up
You now have a clear system for organizing your refrigerator after meal prep that supports freshness, reduces waste, and saves time. Place ready-to-eat meals at eye level, keep raw ingredients below, and use labeled, stackable containers to maximize space. The order in which you store items directly impacts how often you eat well and stay on track. A well-organized fridge isn’t about perfection-it’s about consistency, practicality, and making your system work for you every single day.
FAQ
Q: How soon should I organize my refrigerator after a meal prep session?
A: Wait until all prepared foods have cooled to room temperature, usually within 90 minutes. Placing hot containers directly into the fridge raises the internal temperature, which can affect the safety of other stored items. Once cooled, assign each dish to its designated zone-cooked proteins on the bottom shelf, vegetables in the high-humidity drawer, and sauces in the door-to maintain freshness and prevent cross-contamination.
Q: Why shouldn’t I store raw meats on the top shelf?
A: Raw meats release juices as they thaw or rest, and gravity carries those fluids downward. Storing them on the top shelf risks dripping onto ready-to-eat foods like salads or cheese below. Always place raw proteins on the lowest shelf, preferably in a sealed container or tray, so any leakage is contained and doesn’t compromise other items.
Q: Can I store all my meal-prepped containers in the same size?
A: Using uniform, stackable containers maximizes vertical space and creates a grid-like layout that simplifies access. A mid-sized SaaS firm redesigned its office kitchen using this method and reduced fridge overcrowding by 40%. Matching containers also make labeling easier and help enforce a consistent rotation system, especially when using the FIFO method.
Q: What’s the best way to label meal-prepped foods?
A: Write the dish name and date with a dry-erase marker directly on the container lid if it’s reusable. For glass jars or non-porous surfaces, use a small piece of masking tape and a fine-tip pen. Avoid vague labels like “stew”-instead, specify “beef & sweet potato stew – 04/17.” This prevents confusion and speeds up decision-making during busy weekdays.
Q: Why does my crisper drawer need separate humidity controls?
A: Leafy greens like spinach and herbs last longer in high humidity, where the vent is closed to trap moisture. Fruits such as apples and grapes emit ethylene gas, so they belong in the low-humidity drawer with the vent open to allow gas to escape. Misplacing these items accelerates spoilage-broccoli stored with apples may yellow within two days.