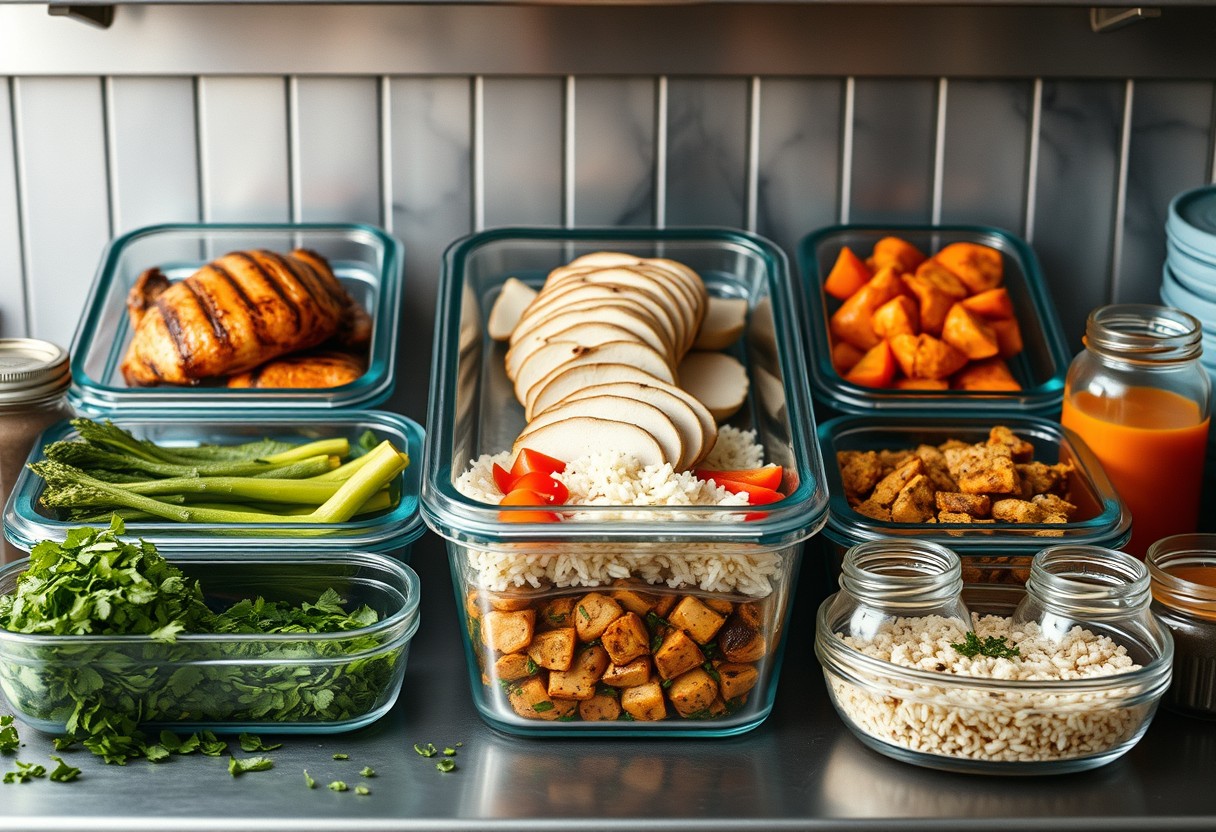
You save time and reduce food waste when you prep components instead of full meals. Rather than cooking entire dishes in advance, you prepare individual ingredients like proteins, grains, and vegetables separately. This method gives you greater flexibility during busy weeks and supports healthier eating by making balanced plates easier to assemble. You maintain control over portion sizes and flavor combinations without getting bored.
Key Takeaways:
- Prepping individual components like proteins, grains, and chopped vegetables saves time during busy weekdays and supports more flexible, balanced meals tailored to daily preferences.
- Using airtight containers and proper refrigeration techniques extends the shelf life of prepped ingredients, with proteins typically lasting 3-4 days and cooked grains up to a week.
- Having ready-to-use elements such as roasted vegetables, grilled chicken, quinoa, and fresh herbs encourages healthier eating by reducing the effort needed to assemble meals on the spot.
Assessing Your Weekly Nutritional Needs and Factors
To build a flexible menu that supports energy, satiety, and long-term adherence, you must first determine the volume and variety your household requires. Individual preferences, activity levels, and dietary goals shape how much protein, fiber, and complex carbs you need each week. Children may require smaller portions with more healthy fats, while active adults often need larger servings of lean proteins and whole grains. Consider tracking intake for a few days to identify patterns. For smoothie prepping, knowing your baseline helps streamline choices-like learning how to meal prep (yes, MEAL PREP) your smoothies without waste or guesswork. Focus on balanced diversity across food groups to maintain nutrition without rigidity.
Determining portion sizes for different family members
Every person in your home has unique caloric and nutritional demands, so one-size-fits-all portions lead to either excess hunger or food waste. An adolescent athlete may need double the rice and chicken compared to a younger sibling, while older adults might prioritize fiber and hydration over bulk. Use visual cues-like a palm-sized portion for protein or a cupped hand for carbs-to tailor servings accurately. Adjust based on daily activity, growth stages, or health conditions. These personalized measures ensure everyone gets enough fuel without overeating, making component prep both efficient and highly adaptable to individual needs.
Identifying versatile ingredients that cross-pollinate recipes
Smart planning means choosing components that work across multiple dishes to reduce waste and increase flavor variety. Ingredients like cooked lentils, roasted sweet potatoes, grilled chicken, quinoa, and sautéed greens can shift seamlessly from bowls to tacos to omelets. These multi-role players save time and expand dinner options without extra effort. Stocking a mix of plant-based and animal proteins, along with seasonal vegetables and whole grains, gives you the flexibility to respond to cravings or schedule changes. The right staples make sticking to healthy eating feel effortless, not restrictive.
How to Master Batch-Cooking Core Proteins
Perfectly cooked proteins form the foundation of flexible, high-quality meals throughout the week. You can roast, grill, or braise large quantities of chicken breasts, ground turkey, tofu, or flank steak in a single session, ensuring each portion remains juicy and structurally sound for use across different dishes. Use consistent thickness when cutting meats and avoid overcrowding pans to guarantee even cooking. Cooling proteins quickly and storing them properly prevents bacterial growth, keeping your base ingredients safe and ready for rapid assembly.
Selecting cooking methods for maximum tenderness
Roasting delivers reliable results for boneless chicken thighs and pork tenderloin, preserving moisture when done at controlled temperatures. You’ll find that slow-simmering tougher cuts like beef chuck or dried beans breaks down connective tissue, yielding dramatically softer textures ideal for shredding or mixing into bowls. For lean proteins such as cod or turkey cutlets, steaming or poaching prevents dryness while maintaining delicate flakiness. High-heat searing works well for exterior browning but requires precise timing-overcooking leads to irreversible toughness, especially with poultry breast.
Seasoning strategies for neutral yet flavorful results
Salt is your most powerful tool-season proteins lightly during cooking so they remain adaptable later. You can enhance depth without overpowering by using aromatics like garlic, onion, or bay leaf in braising liquids or roasting trays, which infuse subtle complexity. Avoid heavy spice blends or sugary marinades that limit versatility; instead, finish with acid or fresh herbs only after cooking if needed. This approach ensures your proteins stay balanced and reheat beautifully without dominating the final dish’s flavor profile.
Tips for Preparing Grains and Starches in Advance
Batch-cooking grains and starches at the start of the week ensures you always have a satiating base for meals, reducing decision fatigue and cooking time. Prepare large quantities of versatile options like brown rice, quinoa, farro, or sweet potatoes, which hold up well over several days. Use a consistent water-to-grain ratio and a reliable pot with a tight-fitting lid to achieve uniform results. Cool them properly after cooking to prevent bacterial growth, and store in clear, dated containers so you can easily track freshness. This method supports consistent energy levels and helps maintain balanced portion control across meals.
- Cook large batches of whole grains like brown rice, quinoa, and barley for versatile meal bases
- Use a rice cooker or heavy-bottomed pot for even heat distribution and consistent texture
- Scale quantities based on your weekly meal rhythm-3-4 cups cooked grain typically feeds one person for 3-4 meals
- Opt for low-moisture starches like roasted sweet potatoes or corn when avoiding mushiness during storage
- Label containers with dates to ensure fresher use within 4-5 days
Cooling techniques to prevent clumping and spoilage
Spreading freshly cooked grains in a thin layer on a baking sheet allows steam to escape quickly, drastically cutting cooling time and minimizing condensation buildup in storage containers. Let them sit at room temperature for no more than 90 minutes to avoid entering the danger zone where bacteria multiply rapidly. Once cooled, transfer to airtight containers-glass is ideal for maintaining breathability and visibility. Skipping rapid cooling risks both texture degradation and food safety hazards, especially with high-moisture varieties like millet or couscous.
Reheating methods to restore texture and moisture
Adding a splash of water or broth before microwaving revives the fluffy consistency of reheated grains, preventing dryness. Cover the container loosely with a damp paper towel to trap steam and encourage even warming. For heartier textures, a quick sauté in a hot pan with a bit of oil restores chewiness and adds subtle depth. Avoid repeated reheating cycles, as they break down starch structure and increase the risk of off-flavors or grittiness. A single, well-executed reheat preserves both quality and palatability.
How to Wash, Chop, and Store Produce for Longevity
Extending the life of your vegetables starts with proper cleaning and storage tailored to each type. Washing immediately after purchase removes field dirt and slows spoilage, but moisture left on produce encourages mold and decay. Drying thoroughly is one of the most effective steps you can take to preserve crispness and prevent early deterioration. Use breathable containers or specialized produce bags that regulate humidity, and separate ethylene-producing items like tomatoes from ethylene-sensitive greens. With these targeted techniques, your chopped vegetables can remain fresh and ready-to-use for up to five days longer than improperly stored counterparts.
Proper drying methods for leafy greens and herbs
Water clinging to delicate leaves accelerates bacterial growth and sogginess. After rinsing, use a salad spinner in short bursts until no more moisture collects at the bottom-this step is essential for maintaining texture. Lay a clean kitchen towel inside the bowl and spin again to absorb residual dampness. For herbs, gently roll them in a dry cloth before refrigeration. Completely dry greens stay crisp for days, while damp ones wilt within hours. Avoid sealing wet leaves in airtight containers, as trapped humidity creates a breeding ground for slime.
Choosing the right containers for different vegetable types
Not all storage vessels support long-term freshness equally. Root vegetables like carrots and radishes thrive when submerged in water inside a sealed glass jar, which preserves crunch for over a week. Cut bell peppers and cucumbers do best in rigid, lidded plastic or glass containers with a paper towel liner to absorb excess moisture. Leafy greens require breathable fabric-lined bins or perforated bags to allow airflow while retaining humidity. Mismatched containers lead to premature spoilage, so match the vessel to the vegetable’s respiration needs for optimal results.
| Vegetable Type | Recommended Storage Method |
| Leafy greens (kale, spinach, lettuce) | Washed, spun dry, stored in a breathable container with a dry cloth |
| Herbs (cilantro, parsley, basil) | Stem ends in water (like a bouquet) or wrapped in a damp cloth, refrigerated |
| Cruciferous veggies (broccoli, cauliflower) | In a partially open container with a damp paper towel to maintain humidity |
| Root vegetables (carrots, radishes) | Trimmed tops removed, stored upright in a jar with an inch of water |
- Always wash produce promptly after purchasing to remove contaminants
- Dry leafy items completely-even small amounts of moisture reduce shelf life
- Use breathable storage solutions for high-moisture vegetables
- Match container type to vegetable respiration rate to avoid condensation buildup
- Avoid sealing wet produce-this creates an environment ideal for mold
Developing Signature Sauces and Dressings
Flavor diversity begins with your ability to design liquid components that transform simple ingredients into distinct meals. By crafting a rotation of signature sauces and dressings, you gain the power to turn roasted chicken, grains, or raw vegetables into entirely different dishes across multiple days. A ginger-scallion oil can refresh steamed greens one night and coat a noodle bowl the next. The real impact lies in how these modular liquids alter perception-making repetitive base components feel unique without extra cooking time or complexity.
Building a pantry of long-lasting flavor boosters
You can maintain bold taste throughout the week by preparing concentrated flavor agents that keep well. Fermented pastes, infused oils, citrus zests, and vinegar reductions add depth without spoilage concerns. A small jar of umami-rich miso caramel or preserved lemon purée becomes an instant lift for proteins or grains. Store them properly and they remain potent for weeks, ensuring every dish benefits from consistent, restaurant-quality intensity. These are not afterthoughts-they’re the secret behind repeatable, vibrant meals.
Emulsification tips for shelf-stable homemade dressings
Stability starts with proper emulsion structure, not just ingredients. When blending oil and acid, slowly drizzle fat into vinegar or citrus while whisking constantly to create a tight, lasting bond. Mustard, tahini, or honey act as natural stabilizers, preventing separation without preservatives. For longer storage, ensure your container is clean and dry before filling-any moisture invites mold. A well-emulsified vinaigrette can last up to two weeks refrigerated and pour smoothly, maintaining its intended texture and balance until the last drop.
- signature sauces
- flavor diversity
- modular liquids
- umami-rich miso caramel
- tight, lasting bond
- shelf-stable homemade dressings
Factors for Successful Component Storage and Rotation
Proper organization and labeling are essential to maintaining food safety and preventing spoilage when storing prepped components. Use airtight, clear containers labeled with both the contents and prep date to ensure visibility and traceability. Arrange your refrigerator shelves strategically, grouping similar components together-proteins on lower shelves, produce above-to minimize cross-contamination. Consistent temperature control and visual tracking make it easier to identify what needs to be used first, reducing waste and safeguarding your health.
- Label every container with the component name and prep date
- Use color-coded lids or stickers for quick visual identification
- Store raw proteins below ready-to-eat items to prevent dripping contamination
- Limit container stacking to maintain airflow and temperature consistency
- Review inventory every 48 hours to monitor freshness and usage
Implementing the “First In, First Out” system
Position newly prepped components behind older ones to ensure older items are used first. This simple practice prevents forgotten containers from spoiling at the back of your fridge. You can reinforce this system by aligning containers in rows and labeling each row with a prep date. Rotating components daily keeps your supply fresh and consistent, reducing the risk of foodborne illness and maximizing ingredient utilization. Over time, this method becomes second nature and significantly cuts down on waste.
Monitoring temperature zones for optimal preservation
Your refrigerator should maintain a consistent temperature below 40°F, but not all zones are equally cold. Store raw meats and dairy on the lower shelves where temperatures are most stable, while ready-to-eat components like chopped vegetables or cooked grains can go on upper levels. Use a refrigerator thermometer to verify each zone’s actual temperature, as built-in dials can be inaccurate. Fluctuating temperatures encourage bacterial growth, so avoid overloading the unit and allow space around containers for proper air circulation.
| Storage Factor | Best Practice |
| Labeling | Include component name and prep date on every container |
| Container Type | Use BPA-free, airtight, stackable containers with moisture vents for produce |
| Refrigeration Zones | Keep raw proteins at 38-40°F on the bottom shelf; cooked items above at 36-38°F |
| Shelf Life Limits | Cooked grains last up to 5 days; raw ground meat should be used within 1-2 days |
| Rotation Frequency | Check and reorganize components every 48 hours to maintain freshness |
To wrap up
You now have a clear, practical approach to simplifying your weekly meals by prepping components instead of complete dishes. This method saves time, supports healthier eating habits, and increases meal variety with minimal effort. By preparing proteins, grains, and vegetables separately, you maintain flexibility and control over each meal. You can mix and match components based on appetite, schedule, or dietary goals. With consistent storage and smart rotation, your ingredients stay fresh and ready. You’re not just cooking-you’re building a sustainable system that works for your lifestyle, one versatile piece at a time.
FAQ
Q: Why should I prep components instead of full meals?
A: Prepping components like cooked proteins, grains, and chopped vegetables saves time during busy weekdays while offering greater meal variety. Instead of eating the same reheated dish every day, you can combine ingredients in different ways-such as adding grilled chicken to a salad one night and tossing it with rice and veggies the next. This method supports flexible eating based on appetite, schedule, and cravings without sacrificing nutrition or convenience.
Q: How do I keep prepped components fresh throughout the week?
A: Use airtight containers and store items at the correct temperatures. Cooked grains and proteins last up to four to five days in the refrigerator, while raw chopped vegetables stay crisp when stored with a paper towel to absorb excess moisture. For longer freshness, freeze portions of cooked beans, meats, or sauces in portion-sized containers. Label everything with dates to track freshness and reduce food waste.
Q: Can I prep components for both lunch and dinner?
A: Yes, prepping versatile base ingredients makes it easy to assemble both meals with minimal extra effort. For example, roasting a large batch of sweet potatoes and broccoli in advance allows you to use them in grain bowls, wraps, or side dishes across multiple meals. Pair with different proteins or sauces to create distinct lunch and dinner options from the same batch of ingredients.
Q: What are the best components to start with for beginners?
A: Start with simple, frequently used items such as shredded chicken, hard-boiled eggs, quinoa, brown rice, chopped lettuce, bell peppers, and cucumbers. These ingredients work across many cuisines and require minimal prep time. Mastering a few reliable components builds confidence and establishes a rhythm for expanding into more complex elements like homemade dressings or fermented vegetables.
Q: How do I avoid meal fatigue when using prepped components?
A: Rotate flavors and textures weekly by changing up seasoning blends, sauces, and ingredient combinations. One week, use lime-cilantro dressing on a bowl with black beans and corn; the next, try a sesame-ginger glaze with edamame and shredded carrots. Keeping a variety of spices and condiments on hand transforms familiar components into entirely new dishes without extra cooking time.