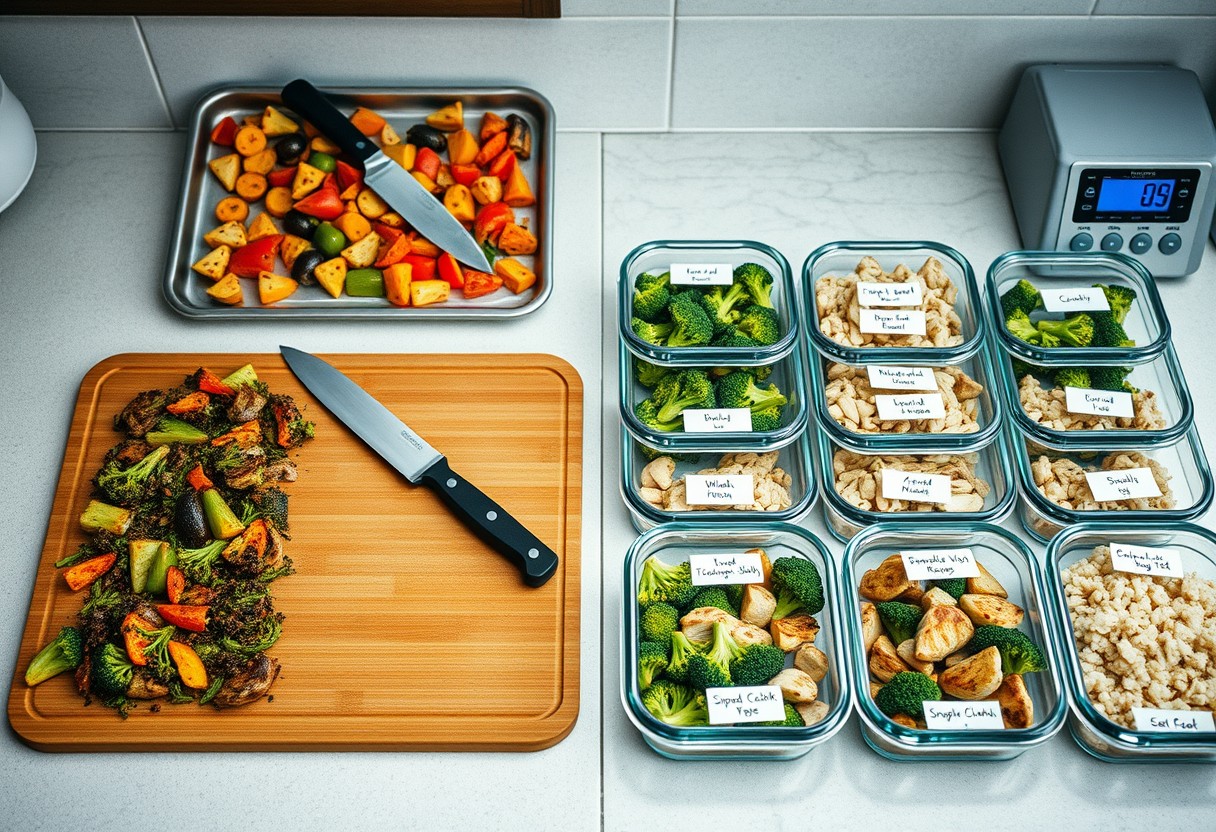
You can skip the all-day Sunday cooking marathon and still eat well all week. The “Two-Day Prep” Method splits your cooking into two manageable sessions-one midweek, one on the weekend-so you never face a fridge full of the same meal. This approach prevents burnout and keeps meals feeling fresh, with less time cooking and more time eating what you actually enjoy.
Key Takeaways:
- Divide your prep into two focused sessions-Sunday and Wednesday-so you’re not stuck cooking for hours at once and meals stay fresh throughout the week.
- Choose ingredients that hold up well after a few days, like roasted vegetables, grilled chicken, and hearty grains, to build meals that taste just as good on Thursday as they do on Monday.
- Use one round of cooking to create multiple dishes-sear chicken for a Sunday dinner, then slice it for grain bowls later, reducing effort without sacrificing variety.
The Split Work
Dividing your meal prep across Sunday and Wednesday keeps flavors sharp and ingredients from softening under prolonged storage. You’ll avoid the slump of soggy vegetables or dull spices that often come from five-day-old prep. By splitting the labor, you preserve texture and taste without overloading one day. The real danger lies in assuming everything must be cooked upfront-many components lose quality when held too long, even in ideal conditions. This rhythm lets you maintain freshness while still saving serious time during the week.
The Sunday Labor
Start by roasting sturdy vegetables like sweet potatoes, cauliflower, and carrots, which hold up well over days. You’ll also cook grains such as quinoa or brown rice, letting them cool before sealing in containers. Raw onions, garlic, and herbs should never be pre-chopped this far in advance-they’ll oxidize and turn bitter. Instead, keep aromatics whole and store them separately. This foundation gives you a solid base without sacrificing quality by midweek.
The Wednesday Return
Three days later, you’ll revive the week’s momentum with targeted cooking that ensures freshness. Sear proteins like chicken breasts or tofu, and sauté delicate vegetables such as zucchini or spinach that would wilt if made earlier. This midweek effort takes under thirty minutes but makes a dramatic difference in flavor and texture. What you gain isn’t just better-tasting meals-it’s the psychological boost of renewed control over your routine, right when motivation typically dips.
The Strong Foods
Choose ingredients that endure refrigeration without losing structure or flavor, because weak components turn to mush by day three. Grains like farro, black rice, and steel-cut oats hold their texture even after days in cold storage, making them reliable anchors for meals. These aren’t delicate starches that dissolve when looked at wrong-they thrive under pressure, absorbing flavors while keeping their shape. You need this resilience if you’re skipping daily cooking.
Grains That Last
Farro stands out for its chewy bite and nutty depth, surviving cold storage without softening into paste. Black rice maintains its integrity and deep color, adding visual and nutritional weight to bowls. Steel-cut oats, unlike their quick-cooking cousins, resist sogginess and reheat cleanly. When you cook them properly-covered, low, and stirred only once-they become a sturdy base that doesn’t demand daily attention. These are the grains that work while you sleep.
Roots From The Earth
Carrots, celeriac, and parsnips emerge from winter soil firm and full of flavor, built to last. Their natural density protects them from cold damage, so they won’t wilt or weep in the fridge. Roast them just enough to deepen their sugars but not so much that they collapse, and they’ll hold their form through multiple meals. You’ll find these roots standing tall on day six, still crisp at the core, ready to add earthy balance without last-minute prep.
The Sunday Fire
Start your largest cooking session with proteins and bases that thrive under long, slow heat. This is where time transforms toughness into tenderness-think chuck roast, pork shoulder, or whole chickens. Let them simmer low and slow in a Dutch oven or slow cooker, building depth with just onions, garlic, and a splash of liquid. The longer they cook, the more flavor they release, creating rich, ready-to-use meat for multiple meals. Keep seasoning simple; you’ll refine taste later.
The Big Meat
Choose one substantial cut like beef brisket or lamb shanks to anchor your meal plan. Brown it well first-this step creates a deep flavor foundation no shortcut can replicate. Then cover it with broth or water and let it braise for at least three hours. The meat should pull apart easily with a fork, integrating effortlessly into tacos, grain bowls, or stews later. Cool it quickly after cooking and store it in its cooking liquid to preserve moisture and taste.
The Base Beans
Beans cooked from dry offer better texture and cost far less than canned. Use a pound of dried pintos, blacks, or chickpeas, soaked overnight and drained before simmering. Cook them in fresh water with a bay leaf and onion until completely tender but not mushy-this takes 1.5 to 2 hours. The beans will absorb surrounding flavors during later reheating, making them adaptable across dishes. Store them in their cooking liquid to maintain softness and prevent drying in the fridge.
The Wednesday Heat
Reignite your midweek meals with a burst of fresh texture and fast heat. You don’t need elaborate steps-just a skillet and five minutes to transform stored components into something vibrant. A quick sear or steam revives flat grains and softens sturdy greens, making them feel entirely new. For inspiration on creating inviting, low-effort gatherings, explore 4 Essentials for Memorable Entertaining to keep your rhythm smooth and your energy high.
The Green Leaves
Leafy greens added at the last moment bring a crisp contrast that dulls if prepped too early. Toss spinach, arugula, or frisée into warm bowls just before serving so they wilt slightly but retain structure. This brightens every bite and introduces a refreshing coolness beneath the heat. Keep them washed and dried in airtight containers to maintain freshness until the moment they shine.
The Fast Sear
Seared proteins or charred vegetables take under three minutes but change the entire character of a dish. Heat a dry skillet until smoking, then flash-cook slices of steak, mushrooms, or zucchini for a deep, caramelized edge. The high heat locks in juiciness while creating a flavorful crust that dry meal prep often lacks. Never skip this step-it’s the fastest way to feel like you’re not reheating, but cooking.
The Cold Glass
Glass containers with airtight seals are your best defense against spoilage during the two-day prep window. Unlike plastic, glass doesn’t absorb odors or degrade over time, and when sealed properly, it creates a barrier that keeps moisture in and bacteria out. You’ll notice meals stay fresher longer, especially sauces and braised dishes that thrive in a stable, sealed environment. Always cool food completely before sealing-trapped steam can lead to condensation, which increases the risk of mold. A snug lid paired with clean handling makes all the difference.
Better Boxes
Not all containers are built to preserve. Opt for glass boxes with locking silicone seals that click shut, ensuring an airtight fit no hand press can guarantee. These containers prevent leaks in transit and maintain internal conditions that slow microbial growth. You’ve likely seen leftovers spoil faster in flimsy lids-this is why. The rigidity of glass resists warping, and the transparency lets you spot early signs of spoilage without opening. Choosing the right seal means choosing safety and flavor retention, two essentials when stretching meals across days.
Cold Places
Your refrigerator’s temperature plays a direct role in how well your prepped meals last. Even with perfect sealing, a warm fridge invites bacterial growth. Keep your unit at or below 40°F (4°C), and store prepped glass containers on middle or lower shelves where cold air circulates most consistently. Avoid the door-it’s the warmest part. Placing hot food directly inside raises the internal temperature, so let meals cool to room temperature first. Consistent cold is non-negotiable for food safety and ensures your prep stays edible and appetizing.
The Sharp Finish
Every meal you revive deserves a final word, not a whisper. Acid and salt are your loudest, most dangerous tools-used carelessly, they overpower; used wisely, they transform flat leftovers into something urgent and bright. You don’t need complexity. You need precision. A few drops of lemon or a pinch of flaky salt can shift flavor from memory to moment, proving that the end should never be an afterthought. The final bite must declare the meal alive.
The Lemon
Lemon juice applied at the end cuts through heaviness like nothing else. You’re not seasoning earlier-you’re correcting now. A squeeze over roasted vegetables or a tired grain bowl wakes the entire plate, lifting flavors that settled during storage. This isn’t subtle enhancement; it’s revelation. The acidity doesn’t just brighten-it resets the palate, making leftovers taste intentional, not reheated. Keep a zester and a bowl of fresh lemons within reach when you serve.
The Crunch
Salt isn’t only about taste-it’s about time and texture. A final sprinkle of sea salt or a handful of toasted nuts creates contrast against soft, reheated dishes. You lose that crispness when you cook ahead, but you can bring it back in seconds. That crunch signals freshness, tricking the brain into believing the meal was just finished. It’s not garnish. It’s closure. Let that last bite crack, not collapse.
Final Words
You save time without sacrificing quality when you use the two-day prep method. Cooking isn’t an all-or-nothing task-it’s about working smarter across the week. You spread the effort, stay flexible, and still eat well. This approach fits real life, not a perfect schedule. You already know what works for your rhythm. Now you have a system that supports it, meal after meal, without burnout or repetition. You keep flavor, nutrition, and ease in balance, which means you’re more likely to stick with it long term.
FAQ
Q: What exactly is the “Two-Day Prep” method?
A: The “Two-Day Prep” method is a cooking strategy designed for people who want to prepare meals efficiently without spending all their Sunday in the kitchen. Instead of cooking every component of every meal at once, you spread prep across two days-typically Sunday and Wednesday. On the first day, you handle proteins and grains that keep well, and on the second, you finish with fresh vegetables, sauces, or items that don’t refrigerate well for long. This keeps food tasting fresh while reducing time spent cooking during the week.
Q: Why not just cook everything on Sunday like traditional meal prep?
A: Cooking everything on Sunday often leads to soggy vegetables, dry proteins, and meals that lose flavor by midweek. The Two-Day Prep method addresses this by splitting tasks. For example, roasted sweet potatoes and grilled chicken might be made Sunday, but sautéed greens and quick-pickled onions are added on Wednesday. A teacher from Portland who tried the method reported her lunches tasted noticeably fresher, and she was more likely to stick with healthy eating through Friday.
Q: How much time does the Wednesday prep session take?
A: The Wednesday session usually takes 20 to 35 minutes, depending on the complexity of the dishes. Since the bulk of the cooking-like baking chicken, simmering beans, or cooking quinoa-was done on Sunday, Wednesday focuses on quick tasks: chopping raw veggies, blending a dressing, or reheating and assembling bowls. A freelance designer in Austin used this method while working from home and found he could finish prep during a single podcast episode.
Q: Can this method work for families or people with different diets?
A: Yes. Families with varied preferences can use the mix-and-match approach. On Sunday, cook a few base proteins and grains that everyone eats-like rice, lentils, and baked tofu. On Wednesday, prepare different toppings or sauces to suit individual tastes: one person might get spicy peanut sauce, another a lemon-tahini drizzle. A couple in Denver used this system when one partner went plant-based and the other didn’t-they shared the base ingredients but customized toppings on the second prep day.
Q: Do I need special containers or tools for this method?
A: Standard meal prep containers with separate compartments work well, especially ones that are microwave-safe for quick reheating. Having two or three small jars for dressings or sauces helps keep components fresh and prevents sogginess. A meal prep blogger in Seattle recommended using divided stainless steel containers for the Wednesday additions, which she said kept her kale crisp for days. No high-end gear is required-just basic kitchen tools and a little planning.