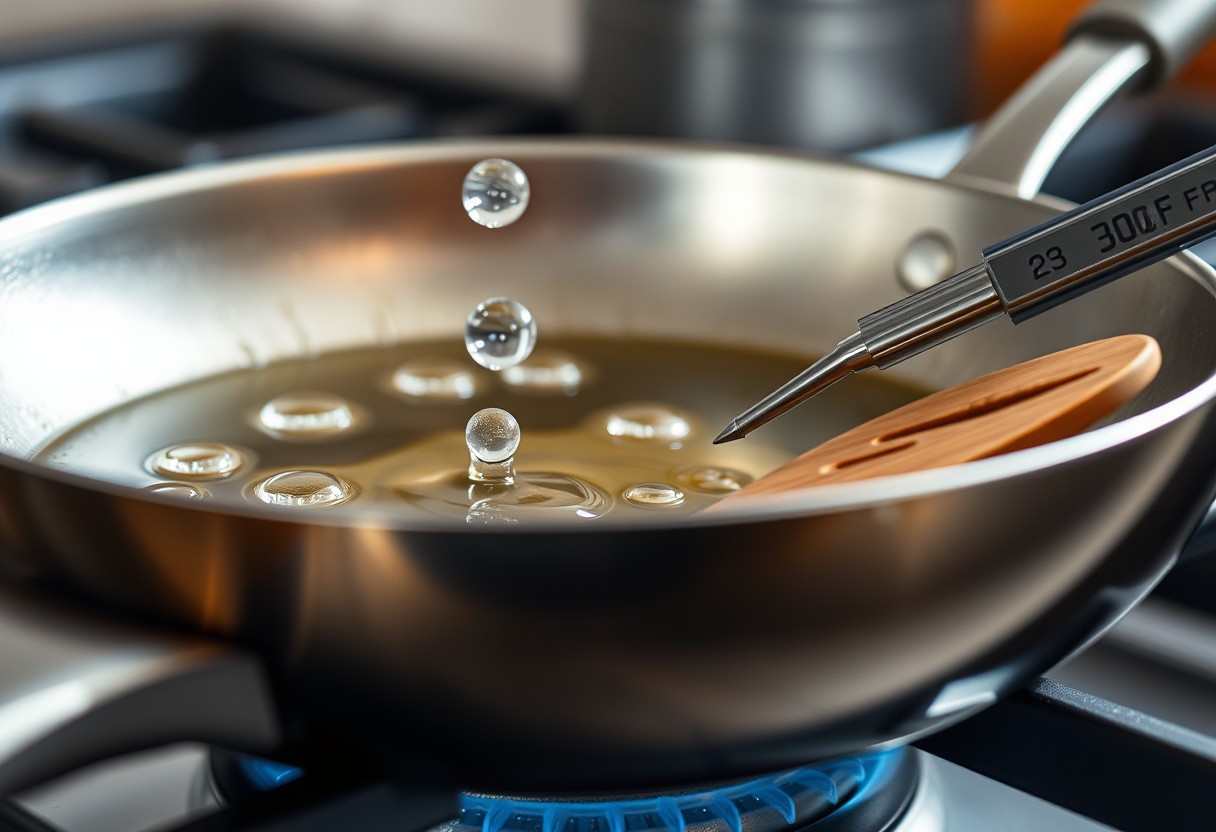
You need to know when your pan is truly ready because cooking in a pan that’s not hot enough can lead to soggy food and uneven browning. On the other hand, overheating certain oils can release harmful smoke. With simple visual and sensory cues-like how water behaves or how the oil flows-you can judge heat accurately and safely every time.
Key Takeaways:
- A pan is ready when a few drops of water flicked onto the surface skitter and dance across the metal before evaporating, a sign known as the Leidenfrost effect, indicating the surface has surpassed 200°C (392°F).
- Oil poured into a properly heated pan will shimmer and flow like liquid silk, spreading evenly without smoking immediately, signaling it’s at an optimal temperature for searing or sautéing.
- Different pans heat at different rates-thin stainless steel responds quickly, while cast iron takes longer but holds heat more evenly, so visual and sensory cues matter more than timing.
Understanding the Role of Preheating
Heat needs time to spread evenly across your pan’s surface before food hits it. Without proper preheating, some areas stay cooler than others, leading to uneven cooking and inconsistent browning. You’ll notice parts of your steak gray while others char, or pancakes that brown on one side and stay pale on the other. Uneven heat also increases the chance of food sticking, especially with delicate items like eggs or fish. Letting the pan heat fully before adding oil or ingredients allows the metal to stabilize, creating a more reliable cooking surface that responds predictably to temperature changes during searing or sautéing.
Why pan temperature matters for texture
Temperature directly shapes how your food feels and looks when finished. A properly heated pan triggers rapid surface browning through the Maillard reaction, locking in moisture and building flavor. If the pan is too cool, proteins seize up and release liquid, steaming instead of searing. This results in rubbery edges and a boiled appearance rather than crisp, golden crust. High, stable heat creates the textures you expect from restaurant-quality dishes-crispy skin on chicken, a caramelized crust on steak, or evenly browned pancakes with slight resistance when bitten.
| Situation | Outcome |
|---|---|
| Pan properly preheated | Even browning, crisp texture, minimal sticking |
| Pan heated too quickly | Hot spots, scorching, uneven cooking |
| Pan not heated enough | Food steams, sticks, lacks color and flavor |
| Pan allowed to stabilize | Consistent results, better control over cooking process |
Avoiding the stick-and-tear phenomenon
Food sticks when proteins bond with metal before the surface gets hot enough to create a natural release barrier. This is especially common with eggs, fish, and chicken breasts in stainless steel pans. A fully preheated pan minimizes direct protein adhesion by creating a slight thermal lift that separates the food from the surface as it cooks. When the pan reaches the right temperature, moisture on the food’s surface evaporates quickly, reducing the chance of glue-like sticking. You’ll see less residue left behind and cleaner flips when you wait for proper heat development.
Using the Water Droplet (Leidenfrost) Test
Observing how water behaves on your stainless steel pan’s surface gives you a clear signal of readiness for searing. When the pan reaches the ideal temperature-typically above 375°F (190°C)-water droplets will form into tight beads and skitter across the surface like mercury, rather than sizzling violently or pooling. This phenomenon, known as the Leidenfrost effect, means the pan is hot enough to create an instant vapor barrier under each droplet, preventing rapid evaporation. Relying on this visual cue ensures you avoid adding food too early, which can lead to sticking and poor browning.
How to perform the mercury ball test
Flip a few drops of water onto the heated pan using your fingers or a spray bottle. If the pan is not yet hot, the droplets will flatten and evaporate quickly with a hiss. As the temperature climbs past the Leidenfrost point, each drop will pull into a near-perfect sphere and glide smoothly across the metal, lasting several seconds before vanishing. This “mercury ball” behavior confirms the surface is uniformly hot and ready for proteins or vegetables that demand high-heat contact. Never use large amounts of water-it can cool the pan or cause splattering.
Interpreting different evaporation speeds
The speed at which water disappears tells you precisely where your pan sits on the heat spectrum. Immediate, violent sizzling means the pan is warm but still too cool for effective searing-food added now will likely stick. A slow simmer and gradual absorption suggest inadequate preheating. But when droplets hover and last three to five seconds while dancing on the surface, you’ve hit the optimal range for caramelization and crisp crust formation. Ignoring these signals risks steaming instead of searing, undermining texture and flavor development in your dish.
Monitoring Oil Behavior and Smoke Points
Oil’s movement and appearance offer clear signals that your pan has reached cooking temperature. When you pour oil into a hot pan, it flows like water and quickly develops a subtle shimmer across its surface. Thin streaks, known as “legs” or “fingers,” may radiate outward-this means the fat is hot and evenly distributed. Waiting for these visual cues prevents food from sticking and ensures a proper sear. For more insights on mastering this step, check out this discussion on Heating the pan.
Identifying the shimmer and legs of hot oil
You’ll notice the oil begins to move freely when the pan hits the right temperature. A thin, reflective sheen spreads quickly, resembling liquid silk. As heat increases, fine lines-called “legs”-form and pulse across the surface like tiny rivulets. These legs are a reliable sign the oil is hot enough for proteins like steak or fish, promoting immediate browning instead of steaming. If the oil stays sluggish or pools unevenly, the pan needs more time over the flame.
Understanding safe smoke point thresholds
Smoke rising steadily from the oil means you’ve hit or passed its smoke point, the temperature where fats begin to break down. Exceeding this threshold releases harmful compounds and bitter flavors, compromising both health and taste. Different oils have varying limits-extra virgin olive oil smokes lower than refined avocado or grapeseed oil. Watch closely: a wisp or two may be normal, but continuous smoke means it’s too hot. Adjust the heat before adding food to stay within a safe range.
Evaluating Physical and Sensory Indicators
To gauge your pan’s readiness without direct contact, rely on tools and sensory cues that keep you safe while ensuring accuracy. An infrared thermometer offers precise surface readings, while the hand-hover technique provides a fast, traditional check. Different materials respond uniquely to heat, but your immediate focus should be recognizing safe and effective heat levels through observable signals. Never touch a pan directly to test temperature-consistent, non-contact methods prevent burns and improve cooking outcomes.
Using an infrared thermometer for precision
An infrared thermometer gives you an exact surface reading within seconds, eliminating guesswork. Hold it 2-3 inches from the pan’s center and press the trigger-most models display results instantly. For searing meats or stir-frying, aim for a reading between 375°F and 450°F depending on your oil choice. Temperatures above 500°F may degrade nonstick coatings or ignite oils, so stay within safe ranges. This method is especially helpful when cooking delicate proteins or using expensive cookware that demands temperature control.
The hand-hover technique for quick estimation
Hold your palm about five inches above the pan’s surface and count how long you can tolerate the heat. If you last 5-7 seconds, the pan is warm but not ready. At 2-3 seconds, it’s medium-hot and suitable for most sautéing. When heat forces your hand away in under two seconds, the pan is hot enough for searing or browning. This method isn’t foolproof and should be used cautiously, but it remains a reliable, immediate check when tools aren’t available. Avoid lingering too long to prevent discomfort or injury.
Factors Influencing Pan Heating Time
Material density and burner output play a decisive role in how quickly your pan reaches the right cooking temperature. Denser pans like cast iron store more heat but take longer to warm up, while thinner materials respond faster. Your stove’s power output directly impacts this process-higher BTU burners deliver energy more rapidly, shortening preheat time. Matching pan size to burner diameter ensures even heat distribution, preventing cold spots. Always account for both the pan’s construction and your stove’s capabilities for reliable results.
- Material density affects how fast a pan absorbs and holds heat
- Burner output determines the rate of temperature increase
- Pan thickness influences heat retention and preheating duration
- Stove type (gas, induction, electric) alters heat delivery efficiency
Cast iron versus stainless steel heat retention
Cast iron outperforms stainless steel in heat retention due to its high material density. Once fully heated, it delivers a steady, even temperature ideal for searing. You’ll notice fewer fluctuations when adding food, reducing the risk of steaming instead of browning. Stainless steel heats more quickly but cools faster on contact, requiring precise timing. For consistent results with heavy-duty cooking tasks, cast iron’s thermal mass gives it a clear advantage when properly preheated.
Impact of burner size and flame intensity
Burner size must align with your pan’s base to maximize heat transfer. A small flame under a large pan leaves the edges cool, creating uneven cooking zones. High flame intensity speeds preheating but risks hotspots if unmanaged. On gas stoves, you can visually adjust the flame to match the pan diameter. Induction burners automatically detect pan size but vary in maximum output. Matching intensity to both cookware and recipe needs ensures efficient, even heating from edge to center.
Tips for Maintaining Consistent Heat
Keeping your pan at a steady temperature ensures even cooking and prevents dangerous temperature drops that can lead to soggy or unevenly cooked food. Use a burner that matches your pan’s size to distribute heat evenly, and avoid frequently lifting ingredients to check progress-each peek releases heat. Choose cookware with excellent heat retention, like cast iron or heavy-gauge stainless steel, and resist the urge to add ingredients too early. Maintaining a steady flame or setting helps preserve the pan’s thermal energy throughout the cooking process.
- Match the burner size to your pan for uniform heating
- Limit lid lifting or stirring to retain heat
- Select pans with superior heat retention like cast iron
- Preheat fully before introducing ingredients
- Use consistent stove settings unless adjusting intentionally
Avoiding pan overcrowding
Overfilling your pan causes rapid cooling and promotes steaming instead of searing. When too many ingredients crowd the surface, moisture accumulates and the temperature plummets, leading to uneven browning and rubbery textures. Cook in batches if necessary, especially with proteins like chicken or steak, and leave space between pieces. This allows steam to escape and ensures each item makes direct contact with the hot surface for optimal caramelization.
Adjusting heat after adding ingredients
After introducing food, a slight drop in pan temperature is normal, but how you respond matters. If you’re searing meat or stir-frying vegetables, immediately increase the heat slightly to counteract cooling and maintain momentum. Watch for smoke or sticking-if oil stops shimmering or food clings, the pan may have cooled too much. A quick adjustment keeps reactions like the Maillard process active, securing a rich, flavorful crust without burning or undercooking.
To wrap up
You now know how to accurately judge when your pan has reached the ideal temperature for cooking. By observing water droplet behavior, monitoring oil movement, and recognizing subtle sensory cues like heat waves or pan color shifts, you can avoid underheating or overheating. Different pans respond differently, and factors like thickness, material, and stove type affect heating times. With consistent practice and attention to detail, you develop reliable intuition-ensuring better searing, browning, and overall cooking results every time.
FAQ
Q: How long should I preheat a pan before cooking?
A: Most pans need between 3 to 5 minutes over medium heat to reach an optimal cooking temperature. The exact time varies based on the material-cast iron and carbon steel take longer than thin aluminum or nonstick pans. A good rule is to wait until the pan feels consistently warm across its surface when you hold your hand a few inches above it, or until a drop of water sizzles immediately upon contact.
Q: What is the Leidenfrost effect, and how does it help determine pan temperature?
A: The Leidenfrost effect occurs when a liquid, such as water, instantly vaporizes upon hitting a surface much hotter than the liquid’s boiling point. When testing a pan, flick a few drops of water onto the surface. If they skitter and dance across the metal instead of evaporating instantly or sitting still, the pan is around 180-200°C (350-400°F), which is ideal for searing meats or stir-frying.
Q: Can I rely on oil behavior to judge if my pan is hot enough?
A: Yes, watching how oil moves and behaves gives clear clues. Pour in a small amount of oil and observe. If it flows like water and shimmers slightly, the pan is ready. If it smokes heavily, it has exceeded its smoke point and may be too hot, potentially creating off-flavors. For example, extra virgin olive oil starts smoking early, while refined avocado or canola oil tolerates higher heat.
Q: Is there a way to test pan heat without using water or oil?
A: You can assess heat by holding your palm about 5 cm (2 inches) above the pan surface. If you feel a strong, steady wave of heat within 2 to 3 seconds, the pan is hot. This method works well for grilling or searing tasks. Another sign is a faint glow on dark carbon steel or cast iron pans under bright light, indicating high heat absorption.
Q: Why does pan material affect how I judge readiness?
A: Different materials conduct and retain heat differently. Stainless steel heats unevenly at first but holds temperature well once hot. Nonstick pans shouldn’t be overheated and don’t support the water test at high temps due to coating limits. Cast iron takes longer to heat but provides consistent, even results. Recognizing these differences helps avoid burning food or undercooking delicate items like eggs or fish.